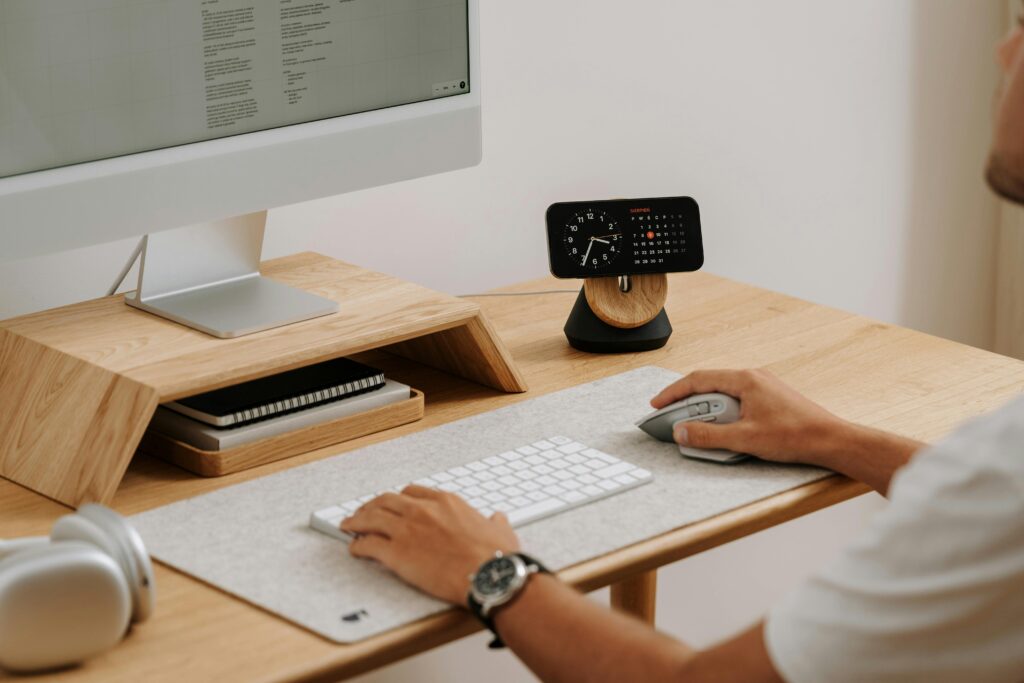


Quick answer: A monitor should be high enough that the top of the screen sits at or just slightly below eye level when you are in your normal working posture, so your gaze lands a little downward at the center of the display. Raising the center of the screen to eye level makes you look slightly upward, which this guide treats as a worse default. If you also stand at the same desk, set the top of the screen to standing eye level instead of leaving it at the sitting height.
Recommended buying guides
Turn this advice into a better setup
If this guide helped you identify what needs fixing, these related buying guides are the next practical step.
Use this monitor height guide to set your screen at the right eye level, reduce neck strain, and decide when a monitor arm or laptop stand is worth buying — including when you sit and stand at the same desk.
If your neck feels tight by mid-afternoon, check monitor height before you blame the chair. When you sit in your normal working posture, the top edge of the screen should sit at or just slightly below eye level so your gaze lands a little downward at the center of the display. Use the tape-line method below to measure once, then decide whether a riser or a monitor arm is the cleaner fix. If you also stand, run the standing worksheet so the screen tracks your eyes — not yesterday’s sitting mount height.
- The Anatomy of the Problem
- The Golden Rule of Monitor Height
- How to Measure Your Ideal Height
- Sitting worksheet (numeric)
- Standing eye-level formula
- Single Monitor Setup
- Dual Monitor Setup
- The Laptop Problem and the Solution
- When a stacker isn’t enough
- Arm vs riser decision
- Do You Need a Monitor Arm?
- FAQ (sit + stand)
The Anatomy of the Problem
For every inch your head tilts downward, the effective weight your cervical spine has to support increases substantially. At neutral (looking straight ahead), your head weighs around 10–12 lbs. At 15 degrees of forward tilt, that effective weight increases to roughly 27 lbs. At 30 degrees, it approaches 40 lbs.
Most laptop users have their screens sitting directly on the desk — which forces roughly 30–45 degrees of downward tilt. They’re asking their neck muscles to support the equivalent of a 40+ pound weight for 8 hours a day.
This is not a posture problem. This is a geometry problem. Fix the geometry.
Soft research note: prolonged downward gaze loads the neck more than a near-neutral posture; exact “effective head weight” figures vary by study and method, so treat viral numbers as directional, not gospel. The practical fix is still geometric: raise the display, keep a slight downward gaze, and preserve distance.
The Golden Rule of Monitor Height
When you’re seated in your normal working position, the top edge (or top third) of your monitor should be at or just slightly below eye level.
This allows your eyes to look forward and very slightly downward at the center of the screen — the most natural and sustainable gaze angle for extended viewing.
How to Measure Your Ideal Height
- Sit in your chair in your normal working posture. Sit up properly — but don’t force it.
- Look straight ahead. Note the exact level where your eyes naturally rest.
- Place a small piece of tape or a sticky note on your wall at that exact height.
- Your monitor should be positioned so its top edge sits at that tape line — or 1–2 inches below it.
Sitting worksheet (fill with a tape measure)
| Step | What to measure | Your number |
|---|---|---|
| A | Floor → seated eye height (look straight ahead) | ____ in |
| B | Floor → desktop surface (chair + desk locked for sitting) | ____ in |
| C | Needed: top-of-screen height above desk ≈ A − B (or A − B − 0.5–1″ if you prefer just-below) | ____ in |
| D | Preferred viewing distance (nose bridge → glass) | ____ in (aim ~20–28″) |
Example (illustrative only): seated eye height 48″, sitting desktop 29″ → top of screen about 19″ above the desk (or ~18–19″ if you want slightly below eye level). A stock stand with 3–5″ of lift often cannot get a 24–27″ panel there without a riser or arm.
Buy if (arm for sitting): your calculated top-of-screen height exceeds what the stock stand + one small riser can reach, or you share the desk with someone of different seated eye height.
Skip if: a single stable riser already puts the top edge at eye level and you never change desk height.
Viewing distance band: roughly 20–28″ for many home-office setups; broader workstation guidance often cites about 20–40″. Larger panels usually want the farther end.
Standing eye-level formula
A sit-stand desk that moves without the monitor tracking eye level is only half a fix. You raise the desktop, the screen stays “desk-relative,” and your neck still tilts — sitting or standing.
The target (standing)
- Top of screen at or just below standing eye level.
- Slight downward gaze to screen center.
- Same ~20–28″ viewing-distance band unless you deliberately step back.
Standing worksheet
| Step | What to measure | Your number |
|---|---|---|
| E | Floor → standing eye height (shoes you actually work in) | ____ in |
| F | Floor → desktop at your standing preset | ____ in |
| G | Needed: top-of-screen height above desk ≈ E − F (optional −0.5–1″) | ____ in |
| H | Delta vs sitting: |G − C| | ____ in |
Why H matters: if the sitting and standing “above desk” targets differ by more than a couple of inches, a fixed riser that was perfect for sitting will be wrong for standing (or vice versa). A monitor arm with enough vertical travel lets you set one clamp and nudge height when you change presets — or lock a compromise if your deltas are small.
Tradeoff: matching both positions perfectly favors an arm. Matching one position perfectly and accepting a small compromise on the other can work with a riser — until neck feedback says otherwise.
When you are ready to shop lift range and clamp fit: best monitor arms for standing desks.
Single Monitor Setup
For a single monitor, center it directly in front of you at correct height. The monitor should be at arm’s length — roughly 20–28 inches depending on screen size. Larger screens should be slightly further away.
The test: You should be able to read text comfortably without leaning forward. If you find yourself leaning in, the monitor is either too far away or too small for its distance.
Dual Monitor Setup
If you have a primary monitor you use 80%+ of the time:
Position the primary monitor directly in front of you at correct height. Place the secondary monitor to the side at the same height, angled 30–45 degrees toward you. When working on the secondary screen, you should need to turn your head — not twist your entire body.
If you split time 50/50 between two monitors:
Place both monitors side by side centered in front of you with bezels touching. Raise both to correct height. The seam between them should be directly in front of you, so you look slightly left or right to each screen’s center.
The Laptop Problem — and the Solution
Using a laptop as your primary screen with it sitting on the desk is the ergonomic equivalent of reading a book held in your lap for 8 hours. The screen is simply too low, always.
The solution is a two-component system:
- A laptop stand ($20–$80) that raises the screen to proper eye-level height.
- An external keyboard and mouse ($30–$100 combined) so your hands are at the right level while the screen is at eye level.
This combination is the single highest-ROI ergonomic upgrade for laptop users. You’re looking at $50–$180 total for something that eliminates the primary cause of neck pain in laptop workers. For a full room-by-room walkthrough, see our guide to setting up an ergonomic home office from scratch.
Laptop + sit-stand desk
A laptop on the desktop almost always sits too low for both sit and stand. Raising the laptop to eye level without an external keyboard creates a new problem: shoulders shrug to type.
Fit-first stack:
- Raise the display (stand, arm + laptop tray, or dedicated riser) so the top of the laptop screen meets the same eye-level rule.
- Add an external keyboard and mouse at elbow-neutral height on the desk.
- Recheck viewing distance — and re-check standing eye level when the desk rises.
Buy if: the laptop is your primary display ≥4 hours/day.
Skip if: the laptop is only for portable use and an external monitor already carries the workday.
For panel size and desk-depth constraints (especially 32″), see the 32-inch monitor arm fit guide.
When a stacker isn’t enough
Books, monitor risers, and under-monitor drawers are valid — until they are not.
A stacker is often enough when:
- You mostly sit (or mostly stand) at one desk height.
- You need 2–4″ of lift and the stock stand already has some travel.
- Viewing distance is already comfortable and you only lack height.
- Budget is tight and the stack is stable (no wobble, no overhang tipping risk).
A stacker usually fails when:
- You switch sit ↔ stand daily and the height delta (H) is meaningful.
- You need independent depth control (shallow desk, pull-forward for detail work) — risers do not reclaim rear depth the way an arm can.
- Dual monitors need matching height + angle; stacked boxes drift and look uneven.
- The stack pushes the panel forward on a ≤24″ desk and wrecks viewing distance.
- You need rotation (portrait) or frequent tilt changes.
If height and depth must move with you, skip another riser tier and compare arms on the money page.
Arm vs riser decision
| Need | Prefer riser | Prefer monitor arm |
|---|---|---|
| Sit-only desk | Often yes | Optional |
| Daily sit + stand | Rarely | Yes — lift range that tracks eyes |
| Shallow desk depth | Only if it does not steal distance | Yes — park panel rearward |
| Shared desk (two heights) | Awkward | Yes |
| Budget under ~$40 | Yes | Entry arms exist, but verify weight |
| Heavy / 32″ panel | Check stability | Arm with weight margin |
Amazon-primary starting points (confirm specs on-page)
Absorbed CTAs only — same products already published on the absorb page. Tag workspacewi03-20.
- Amazon Basics Single — simple height + tilt when you mainly need to escape a low stock stand. Check price →
- MOUNTUP Single — value gas-spring motion for frequent sit/stand nudges. Check price →
- Ergotron LX — premium Constant Force feel; strong when you adjust all day. Check price →
- HUANUO Dual — when two external screens must share eye level. Check price →
Buy if (arm): H is large, you sit and stand on the same desk, or you need depth + height together.
Skip if (arm): a single fixed height already matches eye level and distance, and you never change desk presets.
Full comparison: 5 best monitor arms for standing desks.
Do You Need a Monitor Arm?
Not necessarily — but probably yes.
The stand your monitor came with typically adjusts 2–4 inches in height. That may or may not be enough to reach your correct position. A monitor arm gives you full range of motion: height, depth, tilt, and rotation.
Beyond ergonomics, monitor arms free up significant desk depth. The standard monitor stand occupies 8–10 inches of desk space. A monitor arm eliminates that entirely — giving your desk that space back.
For the adjustment freedom alone — especially if you share a setup with someone of different height — a monitor arm is worth the $50–$150 investment.
We’ve reviewed the best monitor arms at every price point — from budget picks to professional-grade.
See the Best Monitor Arms of 2026 →FAQ (sit + stand)
Should the top or the center of the monitor be at eye level?
Top (or just below). Looking slightly down at the center is the sustainable default for most desk work.
Do I use the same formula for sitting and standing?
Same rule (top at/just below eye level + ~20–28″ distance), different measurements. Run both worksheets. If the above-desk targets diverge, prioritize an arm over a fixed riser.
Can I set one arm height for both sit and stand?
Sometimes, if your delta (H) is small. Often you will micro-adjust when you change desk presets — that is a feature of an arm, not a failure of the formula.
Is a laptop stand enough for standing desks?
A laptop stand helps height, but you still need an external keyboard/mouse, and you must re-check standing eye level when the desk rises. An arm with a laptop tray is the flexible version of the same idea.
Next step
- Fill the sitting worksheet (A–D).
- Fill the standing worksheet (E–H).
- If H is more than a couple of inches — or depth is tight — choose an arm, not another stacker.

If neck or shoulder tension is part of your setup problem, use the home office neck and shoulder setup guide alongside the monitor and chair recommendations.
Also useful: best monitor arms for standing desks · ergonomic office chairs · electric standing desks · budget home office under $500.